
How to Add Google Analytics to Your Website: A Step-by-Step Guide
Google Analytics is a powerful tool that allows website owners to track and analyze traffic. By integrating Google Analytics into your site, you can monitor visitor behavior, improve your marketing strategies, and enhance user experience. This tutorial will walk you through the process of adding Google Analytics to your website in a few simple steps.
Step 1: Create a Google Analytics Account
Before you can start tracking your website’s data, you need to create a Google Analytics account.
-
Go to Google Analytics.
-
Sign in with your Google account or create a new one if you don’t have one.
-
Click on Start measuring.

-
Enter your Account Name (e.g., "MyWebsiteAnalytics").

-
Configure account settings and click Next.
-
Set up a property by entering your website name, selecting the time zone, and choosing the currency.

-
Click Next, then select your business category and business size.

-
Click Create and accept the Google Analytics Terms of Service.

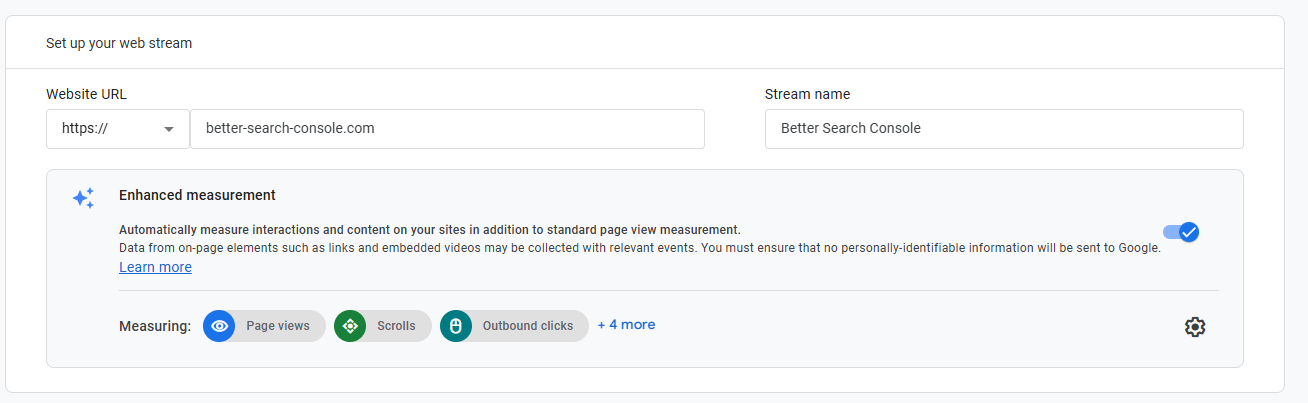
Step 2: Set Up a Data Stream
Google Analytics uses data streams to collect information from your website.
-
Choose your platform: Web, Android app, or iOS app.

-
If you select Web, enter your website’s URL.
-
Name the stream (e.g., "My Website").
-
Enable Enhanced Measurement (recommended) to automatically track page views, clicks, scrolls, and other interactions.
-
Click Create & continue.
Step 3: Get Your Google Analytics Tracking Code
Once the data stream is created, you will receive a tracking code that needs to be added to your website.
-
Copy the provided JavaScript code.

Step 4: Add the Tracking Code to Your Website
To start collecting data, you must add the Google Analytics tracking code to your site’s HTML.
For Static Websites:
-
Open your website’s HTML file.
-
Paste the tracking code inside the
<head>section, before the closing</head>tag.
-
Save and upload the updated file to your server.
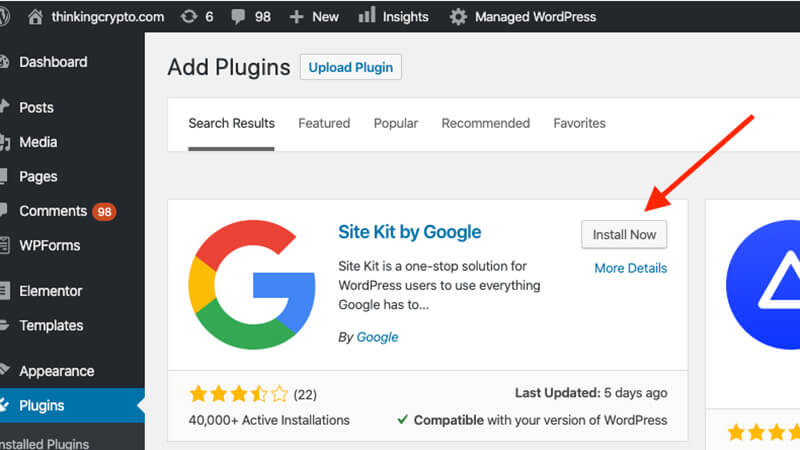
For WordPress Websites:
If you're using WordPress, you can install the Google Analytics tracking code without editing HTML.
-
Install the Site Kit by Google plugin.
-
Activate the plugin and connect it to your Google account.
-
Follow the on-screen instructions to link Google Analytics to your site.

Alternatively, you can manually add the tracking code using a theme settings panel (if available) or a plugin like Insert Headers and Footers.
For Websites Using Google Tag Manager:
-
Log in to your Google Tag Manager account.
-
Select your container and go to Tags.

-
Click New and choose Google Analytics: GA4 Configuration.
-
Enter your Measurement ID and configure triggering to fire on all pages.

-
Save and publish the tag.
Step 5: Verify Your Google Analytics Installation
To ensure Google Analytics is correctly installed:
-
Open your website in a new tab.
-
Go to Google Analytics and navigate to Reports > Real-time.
-
If you see active users, the installation is successful!

You can also use the Google Tag Assistant Chrome extension to check if the tracking code is firing correctly.
Conclusion
By following these steps, you have successfully added Google Analytics to your website. You can now track visitor data, analyze performance, and optimize your site accordingly. Make sure to regularly check your Google Analytics dashboard to gain insights and improve your online presence.